When is a copy not a copy? When it is a copy of a Smart Object! In
Photoshop, there are two very different ways to create copies of Smart
Objects, and each of these has unique and special qualities and
behaviors, which we’ll review right here.
In Photoshop CS4, Adobe “retired” the Picture Package script from the released Photoshop product, although they have, and still do make it available as a download. Many people have worried, fretted and fumed over this omission. But, with Smart Objects, we can create our own Picture Package in Photoshop – better, stronger and faster. Let me show you how.
Before we get started, however, a note for anyone using Photoshop CS5. Adobe has added a new option in preferences that controls how raster images are placed into images. If you’re following along with Photoshop CS5, you’ll want to select Edit > Preferences and make sure you have checked the option for “Place or Drag Raster Images as Smart Objects.”

Users of Photoshop CS4 or CS3 won’t need to do this.
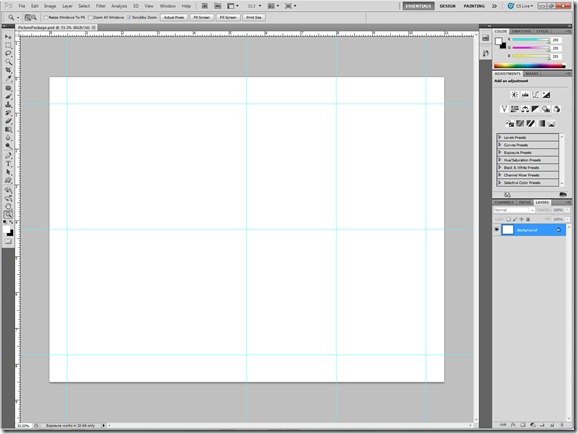
Now, let’s create our Picture Package template. Open a new document, 11 inches wide by 8.5 inches tall (US standard paper size, you can adjust to your local taste). Then, show rulers (Control-R/Command-R) and drag out guides to define the locations where you want your pictures to go. In this case, I’ve created a document that will hold one 5×7 image, and four 2.5×3.5 images. For best results, you should keep the aspect ration the same for all images in the document:
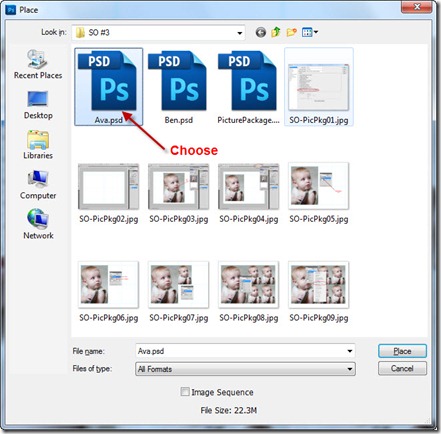
Now, with CS5 I’ll open the Mini Bridge, and drag an image file onto my document. This will have the same effect as File > Place…, and you can use that command in older versions of Photoshop to get the same results:

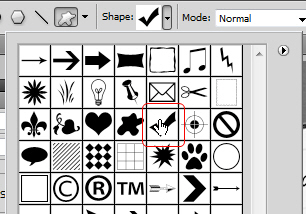
When the document appears on the workspace, it will have the large “X” through it, indicating that you are placing the file. At this point you can move and resize it. I’ll move it into position on the left side and resize it to fill the 5×7 frame. It helps to have “snap” enabled (View > Snap To > Guides). Then, in order to commit the placement, I’ll click the checkmark icon:

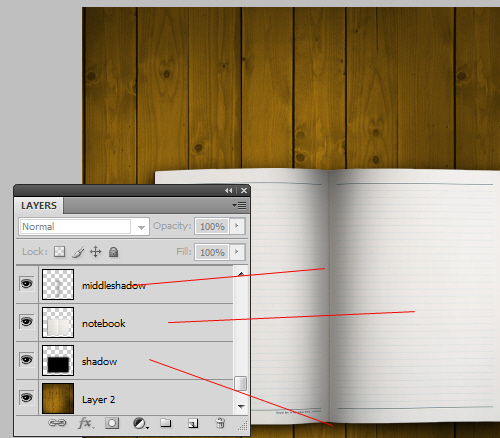
Notice that the image has been placed as a Smart Object, as evidenced by the package icon in the Layers panel. I’ve changed the name of the layer to “Photo:”

Now, to make the copies. Make sure that the Photo layer is selected, and press Control-J (Command-J), or choose Layer > New > Layer via Copy. This creates a second smart object which is linked to the first smart object. This is a key concept when copying Smart Objects in this way.

Now, I’ll use Edit > Free Transform (Control-T/Command-T) to move and resize the copy of the image into position in one of the smaller cells:

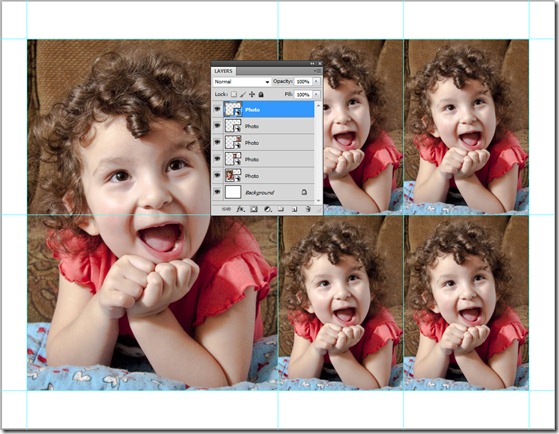
Now, I’ll repeat that three more times to fill the remaining cells. Control-J, Control-T, Drag, Checkmark:
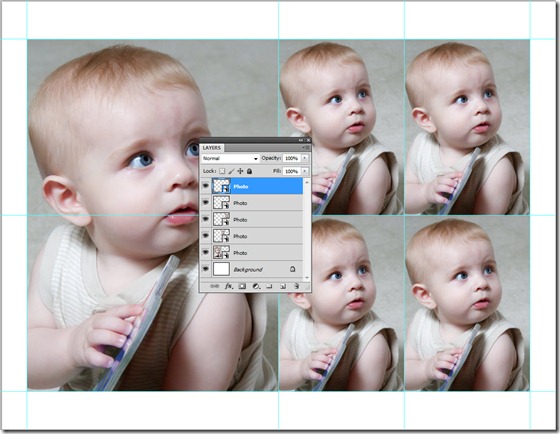
There you have it! Your finished Picture Package… for a 5×7 and four 2.5×3.5 images, ready to be printed.
Not so easy, you say? Lots of work? Here’s the kicker: You never have to do this, ever again! You can reuse this over and over. This is due to the way we copied the Smart Objects, using “New Layer via Copy,” and the fact that in doing so we created four copies that are linked to the first object. Here’s how we put this principle to use in a reusable template:
Start with the image we just created, with the five Smart Objects placed into the Picture Package template. Now, right-click (command click) on any of the Smart Object Layers, and choose “Replace Contents.”

Then navigate to another image (for best results, it should be the same size and aspect ratio). Select it and choose “Place.”
That’s all there is to it. Your Picture Package is updated with the new image, thanks to the capabilities of Smart Objects. Since all the copies are linked together, replacing the contents of one, replaces the contents of all of them, simultaneously!
As long as your new images have the same dimension, you can swap them out endlessly, making this a useful part of a photographer’s workflow. You can create as many of these Picture Package templates as you like, with different combinations of sizes to suit your needs, but remember: you only have to create them once – then you can use them over, and over, and over…
I hope this gives you some ideas for using the power of Smart Objects. Join me next week, as we look at another way to copy and use Smart Objects, with completely different results.
In Photoshop CS4, Adobe “retired” the Picture Package script from the released Photoshop product, although they have, and still do make it available as a download. Many people have worried, fretted and fumed over this omission. But, with Smart Objects, we can create our own Picture Package in Photoshop – better, stronger and faster. Let me show you how.
Before we get started, however, a note for anyone using Photoshop CS5. Adobe has added a new option in preferences that controls how raster images are placed into images. If you’re following along with Photoshop CS5, you’ll want to select Edit > Preferences and make sure you have checked the option for “Place or Drag Raster Images as Smart Objects.”

Users of Photoshop CS4 or CS3 won’t need to do this.
Now, let’s create our Picture Package template. Open a new document, 11 inches wide by 8.5 inches tall (US standard paper size, you can adjust to your local taste). Then, show rulers (Control-R/Command-R) and drag out guides to define the locations where you want your pictures to go. In this case, I’ve created a document that will hold one 5×7 image, and four 2.5×3.5 images. For best results, you should keep the aspect ration the same for all images in the document:

Now, with CS5 I’ll open the Mini Bridge, and drag an image file onto my document. This will have the same effect as File > Place…, and you can use that command in older versions of Photoshop to get the same results:

When the document appears on the workspace, it will have the large “X” through it, indicating that you are placing the file. At this point you can move and resize it. I’ll move it into position on the left side and resize it to fill the 5×7 frame. It helps to have “snap” enabled (View > Snap To > Guides). Then, in order to commit the placement, I’ll click the checkmark icon:

Notice that the image has been placed as a Smart Object, as evidenced by the package icon in the Layers panel. I’ve changed the name of the layer to “Photo:”

Now, to make the copies. Make sure that the Photo layer is selected, and press Control-J (Command-J), or choose Layer > New > Layer via Copy. This creates a second smart object which is linked to the first smart object. This is a key concept when copying Smart Objects in this way.

Now, I’ll use Edit > Free Transform (Control-T/Command-T) to move and resize the copy of the image into position in one of the smaller cells:

Now, I’ll repeat that three more times to fill the remaining cells. Control-J, Control-T, Drag, Checkmark:

There you have it! Your finished Picture Package… for a 5×7 and four 2.5×3.5 images, ready to be printed.
Not so easy, you say? Lots of work? Here’s the kicker: You never have to do this, ever again! You can reuse this over and over. This is due to the way we copied the Smart Objects, using “New Layer via Copy,” and the fact that in doing so we created four copies that are linked to the first object. Here’s how we put this principle to use in a reusable template:
Start with the image we just created, with the five Smart Objects placed into the Picture Package template. Now, right-click (command click) on any of the Smart Object Layers, and choose “Replace Contents.”

Then navigate to another image (for best results, it should be the same size and aspect ratio). Select it and choose “Place.”

That’s all there is to it. Your Picture Package is updated with the new image, thanks to the capabilities of Smart Objects. Since all the copies are linked together, replacing the contents of one, replaces the contents of all of them, simultaneously!

As long as your new images have the same dimension, you can swap them out endlessly, making this a useful part of a photographer’s workflow. You can create as many of these Picture Package templates as you like, with different combinations of sizes to suit your needs, but remember: you only have to create them once – then you can use them over, and over, and over…
I hope this gives you some ideas for using the power of Smart Objects. Join me next week, as we look at another way to copy and use Smart Objects, with completely different results.