Before We Get Started
For this tutorial you are going to need:
Model
Back Ground
Step 1 Create new channel using Calculations
This tool merges two channels for creating a new one. This is great
because we can create a new channel that contrasts the model and the
background.
a) Open your image and double click on it in layers palette to make it editable
b) Select the channels palette
c) Select Calculations in the top menu: Image > Calculations
d) This tool merges two channels for creating a new
one. Usually we select the red one above and the blue one below. In
this case because of the contrast between the hair and the sky we will
select the Green channel above and the blue below.a) Open your image and double click on it in layers palette to make it editable
b) Select the channels palette
c) Select Calculations in the top menu: Image > Calculations
e) Now for the mask to work we need that the inside
of the model is completely with an the background black, so we select
invert the blue channel
f) Now we set the blending mode to subtract with a 100 percent offset (90% of the cases you will use this blending mode)
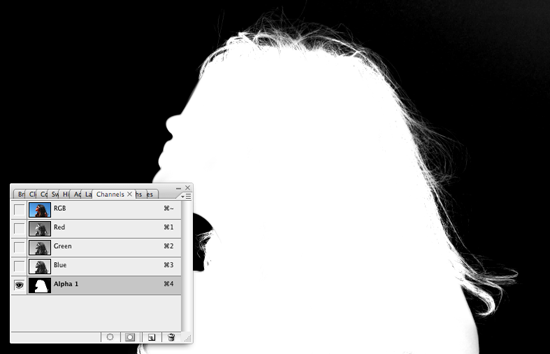
g) Select Ok to create the new channel. This will appear in the channels palette as Alpha 1
As you can se all the hair strains are perfect white and insolated.
It is very important to notice that these are the settings for this particular image. Every image is different so according to the case you will have to play with the settings like the channels or the blending mode to achieve the best mask.
Step 2 Creating path for the face
Now as you can see certain areas of the face and part of the neck and body are not perfect white.
Since this is made of curves we can use the pen tool for this areas
a) Deselect the new alpha 1 channel, select the RGB
b) Create a new path using the pen tool following the face contour and selecting parts of the head, neck and body
c) For this tutorial we are assuming you are familiar with the pen tool. In case you are not next week we are going to publish a tutorial specifically for pen tool.
d) Select path in the palettes and in the options select make selection
e) Enter a feather radius of .5 pixels
Step 3 fine adjusting
We still have some areas like gray or with small part of white, and it should be perfect white and black
a) Select a soft brush
b) Set the mode of the brush to overlay, if you select a white color it will only paint in the white parts, not painting the black ones (important the brush must be set to overlay)
f) Return to the alpha channel (select
only this channel) and paint this mask with white.
Step 3 fine adjusting
We still have some areas like gray or with small part of white, and it should be perfect white and black
a) Select a soft brush
b) Set the mode of the brush to overlay, if you select a white color it will only paint in the white parts, not painting the black ones (important the brush must be set to overlay)
c) Now select a black color to fine paint the black parts
d) Your channel should look like this:
d) Your channel should look like this:
Step 4 Create the mask
a) Deselect the alpha 1 channel and select the RGB
b) Return to layers
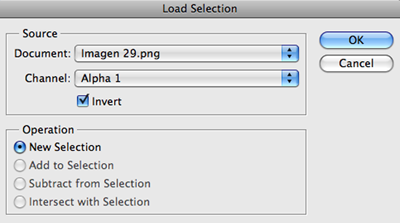
c) Load the selection, in the top menu: Select > Load Selection
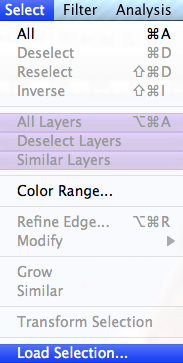
d) Select the Alpha Channel 1 and click on invert
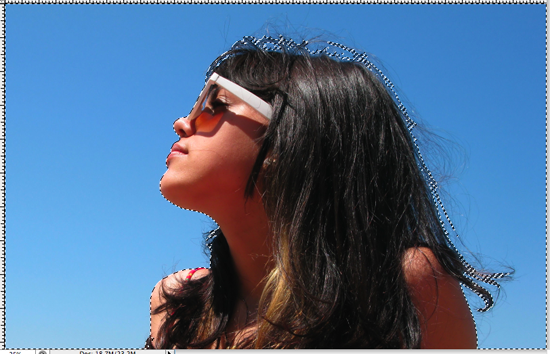
e) Now delete the background
Step 5 Fine adjusting hair
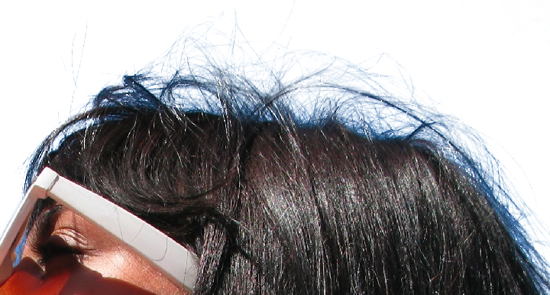
Now we have some fringe (blue color in the hair) caused from the blue background, there are different forms to correct this.
a) Create a new layer
b) Load the alpha channel mask Repeat C and D from step 4 but DONT SELECT INVERT this time)
c) Remove the inner part of the mask (face and neck) you can do this using the polygonal lasso selecting subtract from the selection.

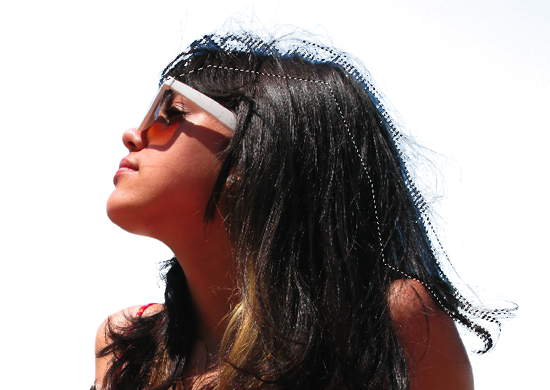
d) Using the eye dropper sample some color of the hair and paint the selection with this color
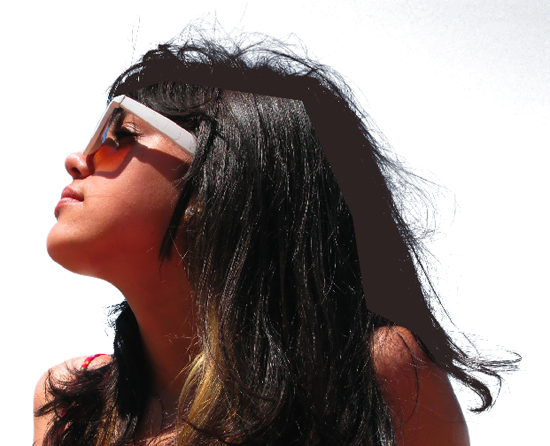
e) Soft the inner part of the mask using a soft brush with the eraser tool
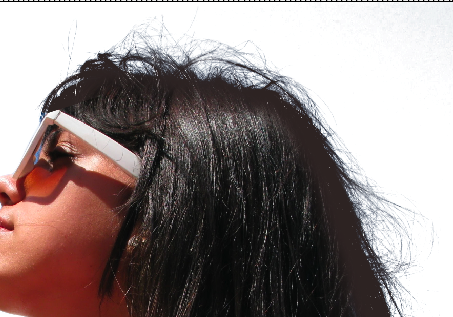
f) Set the blending mode to color
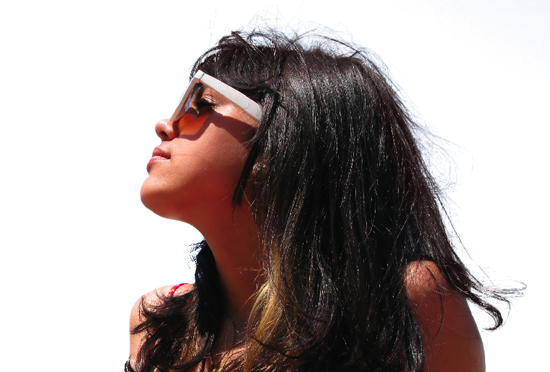
g) Duplicate this layer and set the blending mode to overlay at 35%
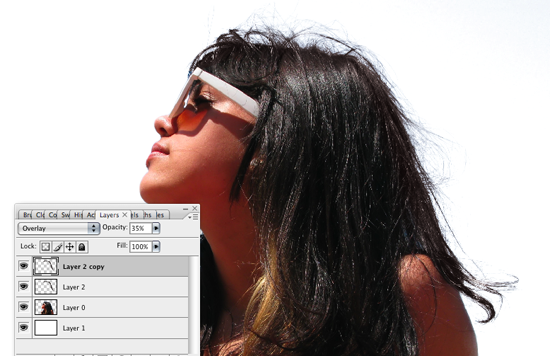
Now we can use any background and we have all of our hair even the thinnest strings.
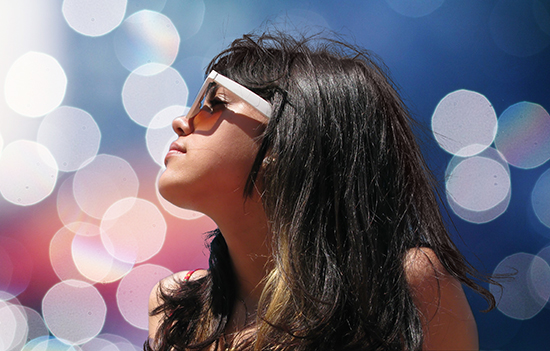
Next part of this tutorial will be done with a blond model because the calculations change.
a) Deselect the alpha 1 channel and select the RGB
b) Return to layers
c) Load the selection, in the top menu: Select > Load Selection

d) Select the Alpha Channel 1 and click on invert

e) Now delete the background

Step 5 Fine adjusting hair
Now we have some fringe (blue color in the hair) caused from the blue background, there are different forms to correct this.

a) Create a new layer
b) Load the alpha channel mask Repeat C and D from step 4 but DONT SELECT INVERT this time)
c) Remove the inner part of the mask (face and neck) you can do this using the polygonal lasso selecting subtract from the selection.

d) Using the eye dropper sample some color of the hair and paint the selection with this color

e) Soft the inner part of the mask using a soft brush with the eraser tool

f) Set the blending mode to color

g) Duplicate this layer and set the blending mode to overlay at 35%

Now we can use any background and we have all of our hair even the thinnest strings.

Next part of this tutorial will be done with a blond model because the calculations change.
Posted in:




0 comments:
Post a Comment